Integrating Halloween Pumpkin 3D Layered SVG Vol. 01 into Your Creative Workflow
For digital crafters, small business owners, and DIY enthusiasts, the transition from a flat design concept to a tangible, dimensional product is often where the real value lies. Halloween Pumpkin 3D Layered SVG Vol. 01 represents more than just a seasonal graphic; it is a structured asset designed to streamline the production of high-quality paper crafts. By understanding how this specific file set fits into your broader creative pipeline, you can reduce preparation time, minimize material waste, and ensure consistent results across multiple projects.
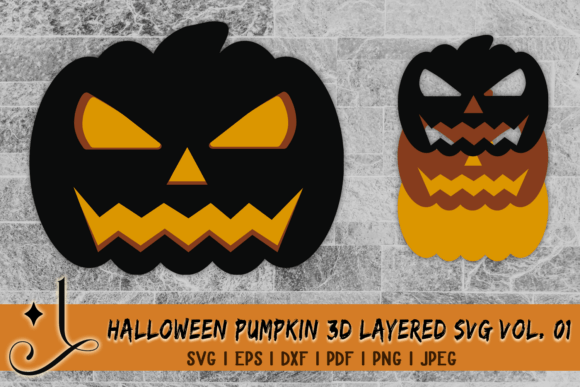
This digital design package features three distinct layered pumpkin cut files that interlock to create a sophisticated 3D effect. Whether you are producing wall art for home décor, designing greeting cards, or creating inventory for an Etsy shop, the utility of these files depends on how well they integrate with your existing tools and processes. This article explores the practical implementation of Halloween Pumpkin 3D Layered SVG Vol. 01, focusing on compatibility, assembly workflows, and quality control.
Understanding the Asset Structure and Compatibility
Before importing any file into your cutting software, it is essential to understand what you are working with. Halloween Pumpkin 3D Layered SVG Vol. 01 is not a single image but a multi-component system. The package includes six standard file formats: SVG, EPS, PDF, DXF, JPEG, and PNG. This variety ensures that the asset is compatible with virtually every major design and cutting platform available today.
- SVG and DXF: Ideal for users of Cricut Design Space, Silhouette Studio, and other vector-based cutting software. These formats preserve clean lines and scalable paths, which are critical for precise cuts.
- EPS and PDF: Best suited for professional printing workflows or users who prefer Adobe Illustrator or CorelDRAW for final adjustments before sending jobs to a cutter.
- JPEG and PNG: Useful for digital previews, social media marketing, or sublimation projects where layering is handled visually rather than physically.
The core of this product is its three separate layers. In a typical workflow, these layers represent different depths of the pumpkin design. When assembled, they create shadow and depth, mimicking the look of carved pumpkins without the mess. For beginners, this pre-separated structure eliminates the tedious task of manually offsetting shapes in design software, allowing you to move directly to the production phase.
Pre-Production: Preparation and Material Selection
Successful execution of 3D papercraft begins long before the blade touches the mat. Integrating Halloween Pumpkin 3D Layered SVG Vol. 01 into your routine requires careful material planning. Because the design relies on layering, the choice of cardstock weight and texture significantly impacts the final aesthetic and structural integrity.
For optimal results, consider using cardstock between 65lb and 80lb cover weight. Lighter paper may buckle under the weight of multiple layers or fail to hold the 3D shape, while heavier board might be difficult to fold if the design includes intricate tabs. Consistency in material selection is key. If you are producing a batch of decorations for a client or event, ensure all sheets come from the same dye lot to avoid color variations that become obvious when layers are stacked.
Additionally, organize your digital workspace before cutting. Import the SVG files into your preferred software and verify that the layers are correctly grouped. Label each layer clearly (e.g., "Base," "Middle," "Top") within your project file. This simple organizational step prevents confusion during the assembly process, especially if you are cutting multiple pumpkins in different colors simultaneously.
Execution: Cutting and Assembly Workflow
Once materials are prepared, the cutting phase is straightforward thanks to the clean lines inherent in Halloween Pumpkin 3D Layered SVG Vol. 01. High-quality vector paths ensure that your Cricut, Silhouette Cameo, or other cutting machines execute sharp turns and fine details without tearing the paper. However, efficiency comes from how you manage the cutting sequence.
- Test Cut: Always perform a test cut on a scrap piece of your chosen material. Adjust blade depth and pressure settings to ensure clean cuts without piercing the backing mat excessively.
- Batch Cutting: If producing multiple units, arrange the layers from all three pumpkins on a single mat if space allows. This reduces machine start-stop cycles and saves time.
- Weeding: Remove excess paper carefully. Use a weeding tool for small interior details. Because the design features clean lines, weeding should be minimal, but patience here prevents damage to the delicate edges needed for assembly.
The assembly process is where the 3D effect comes to life. Apply adhesive sparingly to the contact points between layers. Foam tape or double-sided adhesive dots are recommended over liquid glue, as they provide immediate lift and prevent warping caused by moisture. Start with the base layer, align the middle layer precisely, and finish with the top layer. Using a light box or a window can help align the layers accurately if the design includes intricate overlapping patterns.
Applications in Business and Personal Projects
The versatility of Halloween Pumpkin 3D Layered SVG Vol. 01 makes it suitable for a wide range of applications. For educators and parents, it serves as an engaging STEM activity that teaches spatial reasoning and fine motor skills. For small business owners and entrepreneurs, it offers a scalable product line for the lucrative Halloween season.
Consider integrating these designs into:
- Wall Art: Frame the assembled pumpkins in deep-shadow boxes for a gallery-ready look.
- Greeting Cards: Attach a single layered pumpkin to the front of a folded card stock base for a premium handmade feel.
- Home Décor: Create garlands by stringing together smaller versions of the layered pumpkins.
- Scrapbooking: Use individual layers as embellishments to add texture to memory albums.
From a marketing perspective, the visual appeal of 3D paper crafts performs well on social media platforms like Pinterest and Instagram. Documenting the assembly process can engage your audience and demonstrate the quality of your work. The professional results achieved with Halloween Pumpkin 3D Layered SVG Vol. 01 help build trust with potential customers who value craftsmanship.
Quality Control and Long-Term Use
Maintaining consistency is crucial for repeatable success. After assembling your first few pieces, evaluate the alignment and adhesion. Are the layers symmetrical? Is the adhesive visible? Use these observations to refine your technique. Keep a log of the blade settings and material types that yield the best results for future reference.
Furthermore, store the digital files securely. While Halloween Pumpkin 3D Layered SVG Vol. 01 is a seasonal asset, having it organized in a dedicated folder allows for quick retrieval next year or for last-minute requests. Back up your files to cloud storage to prevent data loss.
If you encounter issues with file compatibility or have specific questions about optimizing the design for unusual materials, do not hesitate to reach out. Support is available to ensure you get the most out of your purchase. Thank you for visiting and for choosing a tool that enhances both your creativity and efficiency.